Accurately sizing your solar system is crucial for maximizing efficiency and cost savings.
A properly sized system ensures you can generate enough power to meet your needs without overspending on unnecessary capacity.
I will provide you with several steps you can utilize to determine the size of your solar system size.
Step 1: Determine Your Average Monthly kWh Usage

The first step in sizing your solar system is to determine your average monthly kWh (kilowatt-hour) usage.
To do this, you’ll need to collect the last 12 months of your electric bills.
The data provides a comprehensive view of your energy consumption patterns, accounting for seasonal variations and lifestyle changes.
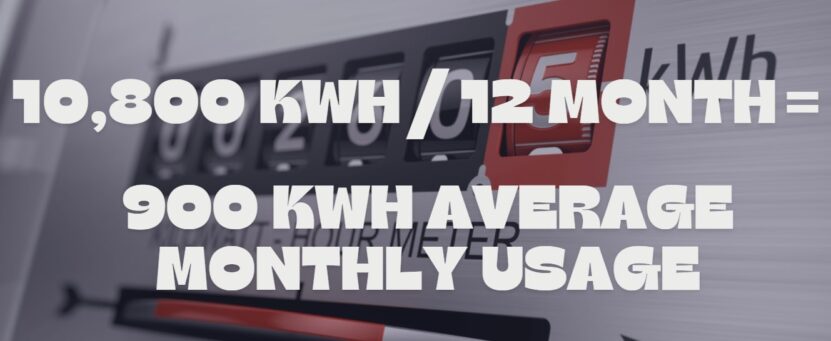
Once you have your electric bills, add up the total kWh used over the year and divide by 12 to find your average monthly kWh usage.
For example, if the sum of your yearly consumption is 10,800 kWh, your average monthly usage would be 900 kWh.
Without this step, you risk installing a system that is either too small to cover your energy needs or too large, resulting in unnecessary expenses.
Accurate data collection and calculation ensure that your solar investment is well-matched to your consumption.
Step 2: Calculate Your Daily kWh Usage

After determining your average monthly kWh usage, the next step is to calculate your daily kWh usage.
The calculation provides a more precise understanding of your daily energy needs and is essential for planning the capacity of your solar system.
To calculate your daily kWh usage, simply divide your average monthly kWh usage by the number of days in a month, typically 30.
For instance, if your average monthly usage is 900 kWh, your daily usage would be 30 kWh (900 kWh / 30 days).
This daily usage figure is important because it represents the amount of electricity your solar system needs to produce each day.
Knowing your daily consumption helps in determining the size of the solar array required to meet your energy demands consistently.
Step 3: Assess the Level of Sun Exposure

Sun exposure is a critical factor in determining the efficiency and effectiveness of your solar system.
The amount of sunlight your location receives directly impacts the energy production capabilities of your solar panels.
To assess your level of sun exposure, you can use tools like the National Renewable Energy Laboratory’s (NREL) and Global Horizontal Irradiance (GHI) maps.
These maps provide data on the average number of sun hours your location receives per day.
For example, Anaheim, California, receives about 5 sun hours per day on average.
However, it’s important to adjust these values for local conditions and the orientation of your solar panels.
Factors such as shading from trees or buildings, panel angle, and roof orientation can affect the actual sun exposure your panels receive.
Optimal panel orientation and tilt can significantly enhance the efficiency of your solar system.
Accurate assessment of sun exposure ensures that your system is designed to capture the maximum amount of solar energy available, thereby maximizing its output.
Step 4: Calculate the Required Solar System Size

Once you have your daily kWh usage and an understanding of your sun exposure, you can calculate the required size of your solar system.
To calculate the required solar system size, divide your daily kWh usage by the number of peak sun hours.
For example, if your daily usage is 30 kWh and your location receives 5 peak sun hours per day, the calculation would be 30 kWh / 5 sun hours = 6 kW. This means you need a 6 kW solar array to meet your daily energy needs.
So, this calculation provides a baseline for the size of your solar system. It’s important to note that this figure represents the optimal system size under ideal conditions.
Real-world factors such as shading, weather variations, and system inefficiencies may require adjustments to this baseline figure to ensure reliable performance.
Step 5: Account for System Inefficiencies
In real-world conditions, solar systems are subject to various inefficiencies that can reduce their overall performance.
These inefficiencies can result from factors such as panel degradation, shading, dust accumulation, and temperature fluctuations.
To account for these inefficiencies, it’s advisable to add a margin to your calculated solar system size.
A common practice is to add a 20% overhead to ensure that your system consistently meets your energy needs despite these inefficiencies.
For instance, if your initial calculation indicated a 6 kW solar array, adding a 20% margin would result in a 7.2 kW system (6 kW x 1.2).
It provides a buffer that enhances the overall efficiency and longevity of your system, making it a more robust and dependable source of energy.
Step 6: Decide on Full or Partial Offset
The decision to offset your energy usage fully or partially depends on your energy goals, budget, and available space for solar panels.
Offsetting 100% of your energy usage means that your solar system will generate enough electricity to cover all your consumption needs.
However, some homeowners may opt for a partial offset, generating enough solar power to cover a portion of their energy needs. The decision might be driven by budget constraints, limited roof space, or a strategic approach to balance initial investment with ongoing savings.
For example, if you choose to offset 50% of your energy usage, you would need a smaller system, reducing upfront costs while still benefiting from reduced electricity bills.
To decide on the offset level, consider your energy consumption patterns, financial goals, and the physical constraints of your installation site. Consulting with a professional solar installer can also provide valuable insights and help you determine the most suitable offset level for your specific situation.

